Before moving on to the rest of the photography for the new website,
I’ll share some of the (mis)adventures I’ve had the last two weeks.
The hope is that it will make my head more organized and streamlined for the next time I shoot, and also that you all might see some of the required precision and artfulness that even the most standard photography requires.
But then, the joy, as well.

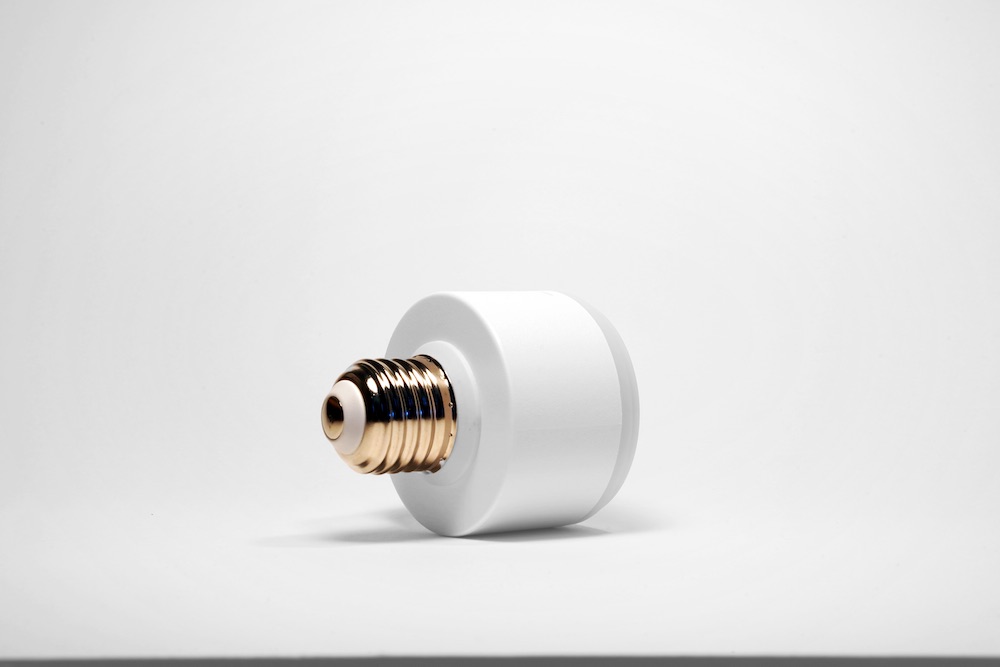
I’m pretty proud of this shot.
So, how did I get here?
One thing I’ve learned throughout all artistic pursuits so far is this:
You don’t need 99% of the equipment that the “professionals” use.
In fact for learning, you’d be better off without it,
since you don’t have the skills to use it well in the first place,
and the best way to develop those skills is from raw practice.
The reality is that most of them would also agree, they don’t need to use the best equipment.
But if they use it they can achieve this one effect, this one detail they wouldn’t have been able to otherwise.
The only qualifier for making this judgment is to have done the grind,
to have put in the hours, and to have made so many sub-par products for so many reasons.
One of my favorite quotes: “sucking is the first step to becoming good at something.”

Last time you saw me dive into it.
Here’s what I remember learning off the top of my head:
- Wide lenses are probably not the thing you want to use.
- Be perfectionist because you can be. (with street photos etc, there is no time for that).
- Lighting and shadows are everything and the slightest tweak with the lamp your holding can make all the difference.
- White balance is something I actually have to really consider.
- Being consistent (shooting manual) for a multi-photo shoot is really helpful later.
- Manually editing everything is worth it, don’t just use luts etc. for product shoots.
- Investing in photoshop was worth it. I don’t want to admit it after 3 years of silently protesting their subscription system and using Luminar instead, but… it’s worth it.
- Though across all photography, it’s really good to have a checklist. i.e. Dust on the sensor? Dust on the screen? In focus? Stabilized? White balance okay? Check all these things because setting up another product shot for a re-shoot is such a pain (though to be honest editing out mistakes is much easier in this field than in video etc.).
- The more you understand light, the more you can use it to your advantage without feeling like you have to create it or manipulate it so much.
This went unedited.

Here is my refining it, and trying out some new things like product videos.

I figured this time I’d try mixing in natural light from the window with artificial light to get rid of the shadows.


You can see how the light angled this way almost completely erases the shadows from the bottom. However you can also see the problem a lot of beginner photographers run into.
Obviously, there’s shadows on the other side now.
Just by looking at the shadows of the object you can tell what lights are being used and where.
But more crucial is the difference in light tones.
Just look at the difference in the level of whiteness between the two pictures.

I figured I’d utilize that big piece of cardboard I found the other day, and use the white as a shield to hopefully reflect the natural light back in and block the shadows. But because of the tripod it was a bit too far away to have enough effect. So I went in.

Also note the classic penny under the round device to keep it from rolling.


I added in the lamp again the reduce the shadows, but bounced it off of the shield.
Overall the effect wasn’t bad, and it came out okay.
But it didn’t come out anywhere near perfect.
As always, setting reins supreme in product photography.
Stop motion video

In lieue of any explanation,
I’m just going to say this is the kind of thing you’re going to have to do
if you want to do product photography at home.
My idea was to make a stop-motion video, and then gif, of the 3 cans moving towards each other, the devices popping out, and clicking together to form stak. 
This was all well and good, but this was biting off a lot.
I needed 6, six, ろく, 六 coins to put under each of these for each individual shot.
In hindsight with this, I want to really solidify my idea before going ahead with the shot.
Because honestly, it is time consuming, and at stak, we care about time.

One more bonus shot for something I was really proud of.
We wanted to get individual device pictures for the site
so we could use them as transitions between the different sections on the front page.
The base would be at the bottom, ideally facing up, to form the bottom of the device.
The problem there is that I had to find a way to balance the device on its light socket end.
I scoured the house and FINALLY found a frosting cap that was
-nearly- the perfect size to fit between the edge of the stak Base and the table.
It took me actually 45 minutes of concentrated balancing.
Then I got it.

You can actually just barely see the bottom left edge of the cap there,
along with the edge of the penny on the right one that kept it from rolling away.
Upon noticing this (and the slightly darker inner circle of the picture born of my reverse vignette attempt)
I hopped back into photoshop and tried to fix the issues. How’s it look?

And then I see that the ring is still pretty visible. Stupid thing.

Much more natural looking.
All I can say is the results are worth it, and it’s surprisingly satisfying.
Turning these into .png files (so there’s no background) was a whole other adventure.
Anyways. Thanks for following along. See you next week!


